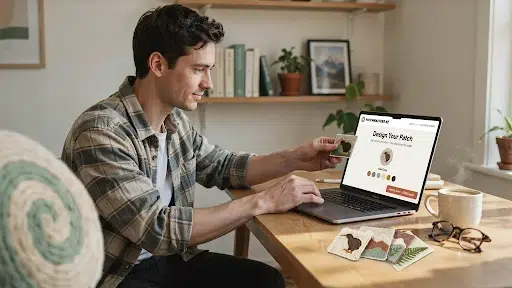
Ordering custom patches should not require you to understand embroidery machinery, stitch files or fabric construction. You should be able to send an idea, review a clear preview and approve the finished design before production starts.
That is exactly how the online ordering process works.
To order custom patches in NZ, decide where the patch will be used, choose a suitable material, provide the required size and quantity, upload your artwork and request a quote. A patch designer then prepares a digital mockup for your approval. Once you confirm the design, backing, colours and price, the patch moves into production.
Embroidery Patch NZ supports individuals, clubs, schools, organisations and businesses throughout Auckland, Wellington, Christchurch, Hamilton, Tauranga, Dunedin and other New Zealand regions.
People searching for custom patches no minimum order NZ usually want to avoid purchasing hundreds of pieces before testing a design. Small and flexible order quantities make it easier to create patches for personal projects, limited merchandise, uniforms, events and new brands.
Exact quantity requirements can vary by material, size and production method, so confirm the available minimum when requesting your quote.
Custom Patch Ordering Process at a Glance
| Stage | What You Provide | What You Receive |
| Project details | Use, size, quantity and deadline | Initial recommendations |
| Artwork | Logo, sketch, photo or written idea | Design assessment |
| Patch options | Material, backing, border and colours | Accurate quotation |
| Mockup | Feedback and revision requests | Free digital proof |
| Approval | Final confirmation | Production-ready design |
| Production | Approved payment and details | Finished custom patches |
| Delivery | New Zealand address | Tracked shipment |
Step 1: Decide Where You Will Use the Patch
Start with the garment or item receiving the patch. This affects almost every decision that follows.
A workwear patch must tolerate regular washing and daily friction. A patch for a rugby jacket should feel durable and substantial. A cap design needs clean lettering that remains readable on a curved surface. Outdoor equipment may need a waterproof material.
Common applications include:
- School and club uniforms
- Jackets, hoodies and T-shirts
- Caps, beanies and bucket hats
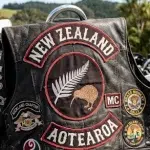
- Motorcycle vests
- Tactical bags and outdoor equipment
- Staff workwear
- Event merchandise
- Promotional giveaways
- Limited-edition fashion collections
Tell your patch maker how the finished product will be used. That information helps the designer recommend the right construction rather than simply reproducing the artwork.
Step 2: Select the Best Patch Type
Material choice determines the texture, level of detail, durability and price of your order.
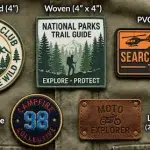
| Patch Type | Best Suited To | Main Benefit |
| Embroidered | Uniforms, jackets, caps and clubs | Classic raised thread texture |
| Woven | Small writing and detailed logos | Fine detail with a flatter finish |
| PVC | Outdoor gear and tactical equipment | Water-resistant and easy to clean |
| Sublimated | Gradients, photographs and complex artwork | High colour and image detail |
| Chenille | Varsity jackets and sportswear | Thick, soft and bold appearance |
| Leather | Hats, denim and premium merchandise | Rugged and refined finish |
| Appliqué | Large designs and fashion garments | Layered fabric construction |
Traditional custom embroidered patches remain a strong choice for logos, names, uniforms and team emblems. Their thread texture gives the design a professional finish that works particularly well on work shirts, jackets and headwear.
Designs with tiny lettering or thin lines may look clearer as woven patches. PVC is usually more practical for wet, muddy or exposed environments. Sublimation works well when the design contains photographic detail or complex colour transitions.
The comparison of different types of patches in NZ can help you narrow the options before requesting a quote.
Step 3: Choose the Patch Size and Shape
Measure the available space on the garment rather than estimating it from a computer screen.
Common patch sizes include:
- 50 to 75 mm for caps and small chest logos
- 75 to 100 mm for sleeves, bags and standard uniforms
- 100 to 150 mm for larger jacket designs
- 250 mm or more for motorcycle vest and jacket back patches
Patch measurements normally refer to the widest and tallest points of the design. A patch measuring 100 mm wide and 60 mm high should be submitted with both dimensions clearly stated.
You can choose a circle, square, rectangle, oval, shield or custom die-cut shape. A die-cut patch follows the outline of your artwork and can make mascots, animals, symbols and brand marks feel more distinctive.
Complex shapes may affect border construction and pricing. Ask the designer whether a merrowed border or heat-cut border is more suitable for your chosen outline.
Step 4: Upload Your Logo, Artwork or Idea
You do not always need finished professional artwork to order embroidery patch online NZ.
A custom patch maker NZ may be able to work from:
- AI, EPS or editable PDF artwork
- SVG vector files
- High-resolution PNG or JPEG files
- A photograph of an existing patch
- A scanned drawing
- A simple hand sketch
- Written instructions describing the idea
Clear vector files usually produce the best starting point. However, a rough concept can still be developed into a usable patch design.
Avoid submitting tiny screenshots, blurred social media images or heavily compressed logos. They can make small text, borders and colour separations difficult to identify.
Artwork created for printing cannot be sent directly to an embroidery machine. It must first be converted into a stitch file that controls stitch direction, density, sequence and underlay. An embroidery digitizing service handles this technical conversion and prepares the design for accurate machine production.
Step 5: Select the Backing and Border
Backing determines how the patch attaches to the garment.
| Backing | Recommended Use | Attachment Method |
| Sew-on | Permanent uniforms and jackets | Hand or machine stitching |
| Iron-on | Everyday clothing and simple application | Heat press or household iron |
| Hook and loop | Tactical gear and interchangeable badges | Removable hook-and-loop panel |
| Peel and stick | Events and temporary displays | Pressure-sensitive adhesive |
| No backing | Craft projects or later attachment | Customer-selected method |
| Plastic backing | Patches needing added stiffness | Usually sewn to the garment |
Sew-on backing offers a secure long-term attachment. Iron-on backing is convenient, but it must be compatible with the garment’s heat tolerance. Hook-and-loop backing is better when patches must be removed, replaced or repositioned.
The article on sew-on patches in New Zealand explains why stitched attachment remains popular for jackets, uniforms and garments exposed to frequent washing.
Your border also matters. Merrowed borders create a thick, rounded edge and work best on simple shapes. Heat-cut borders are thinner and follow complex custom outlines more accurately.
Step 6: Request a Free Mockup and Quote
Once the main specifications are ready, submit the following information:
- Patch type
- Width and height
- Required quantity
- Backing preference
- Border style
- Artwork file
- Delivery location
- Required completion date
- Any special colour or thread instructions
A request for free mockup patches NZ should include enough detail for the designer to prepare an accurate proof. Mention whether colours must match a brand guide and whether small text needs to remain readable.
The quotation may change based on size, quantity, thread coverage, backing, border and artwork complexity. Larger quantities generally reduce the price per patch, but you should compare the total cost rather than focusing only on the lowest unit price.
You can check our pricing to understand how measurements and quantities may affect the estimated cost before submitting your project.
Step 7: Review the Digital Proof Carefully
The digital proof is your opportunity to correct the design before it reaches production.
Check:
- Spelling, dates and numbers
- Logo proportions
- Thread or material colours
- Patch dimensions
- Border thickness
- Backing selection
- Shape and cut line
- Placement of small text
- Quantity and delivery information
View the proof at its intended physical size. A line that looks clear on a large monitor may disappear when reduced to a 65 mm patch.
Ask for revisions when something is unclear. Moving a word, thickening a line or simplifying a tiny symbol before approval is easier than correcting completed patches.
For more context on professional construction, the breakdown of how custom embroidered patches are made explains how artwork moves from design preparation to stitched production.
Step 8: Approve Production and Arrange Delivery
Production begins after you approve the proof and confirm the order details.
Save a copy of the final digital proof, invoice and written specifications. These files make future reorders easier and help prevent confusion if your organisation requires the same design later.
Standard turnaround can depend on the material, quantity, complexity and delivery destination. The website currently advertises an estimated turnaround of around 7 to 10 business days for standard orders, although urgent jobs and highly specialised patches may follow a different schedule.
Tell the team about event dates, uniform launches or campaign deadlines before approving production. Allow extra time for proof revisions and shipping to regional or rural addresses.
Before ordering, you can also view customer reviews to see feedback relating to patch quality, communication and delivery experiences.
What Affects the Price of Custom Patches in NZ?
There is no single price for every design. The main cost factors are:
- Patch dimensions
- Total quantity
- Material type
- Percentage of embroidery coverage
- Number of colours
- Artwork complexity
- Backing choice
- Border construction
- Metallic, glow or 3D effects
- Delivery schedule
A small embroidered name patch and a full-colour PVC emblem require different production processes. Request a quote based on your actual artwork rather than relying on a generic unit price.
Common Mistakes to Avoid
- Do not order before checking the patch at its real size. Small text and narrow lines are the most common sources of production problems.
- Do not choose a backing without considering the garment. High heat can damage waterproof fabrics, nylon and some synthetic materials.
- Do not approve an incorrect colour because it looks close on one screen. Share Pantone references or brand colour values when colour accuracy matters.
- Do not leave your deadline until the final stage. Production, revisions and nationwide delivery all require time.
- Most importantly, do not approve a proof without checking every word. The approved file becomes the production reference.
Frequently Asked Questions
How do I order custom patches in NZ?
Choose your patch type, size, quantity, backing and border. Upload your artwork through the quotation form, review the free digital mockup, request any changes and approve the final proof for production.
Can I order one custom patch in New Zealand?
Small orders may be available, but minimum quantities can depend on the selected material and production method. Ask for the current minimum when requesting your quote. The live pricing table currently begins at 10 pieces for several patch categories.
Can I get a free patch mockup before paying?
A digital mockup allows you to check the shape, colours, border and layout before production. Confirm whether payment is required before or after proof approval when submitting the order.
What file should I upload for a custom patch?
AI, EPS, SVG and editable PDF files are preferred. High-resolution PNG and JPEG files can also work. A clear sketch or photograph may be used when professional artwork is unavailable.
Which patch type is best for detailed logos?
Woven patches work well for thin lines and small lettering. Sublimated patches are better for photographs, gradients and highly detailed colour artwork. Embroidery suits bold shapes, readable text and classic logo designs.
How long do custom patches take in New Zealand?
The website advertises an estimated standard turnaround of around 7 to 10 business days. Actual timing depends on design approval, quantity, material, production requirements and delivery location.
What is the best backing for custom patches?
Choose sew-on for permanent attachment, iron-on for convenient application and hook-and-loop for removable patches. The garment fabric and expected use should guide the final choice.
Are custom patches delivered outside Auckland?
Yes. Orders can be arranged for customers across New Zealand, including Wellington, Christchurch, Hamilton, Tauranga, Dunedin and regional locations. Provide the full delivery address when requesting a quote.
Bring Your Patch Idea to Life With a Clear, Simple Process
Knowing how to order custom patches NZ customers can trust starts with a clear brief. Decide where the patch will be used, select the right material, provide accurate measurements and review the digital proof carefully.
You do not need advanced design skills or a large wholesale project to begin. A logo, sketch or written idea is enough to start a conversation with a patch designer.
Submit your artwork, request a free mockup and confirm the quantity available for your chosen style from the Embroidery Patch New Zealand dedicated team. With the material, backing, dimensions and colours approved, your design can move confidently from a screen to a finished patch made for your team, organisation, brand or personal project.