Most people attempt DIY custom embroidered patches and end up with uneven stitching, puckered fabric, and colours that look nothing like the original design. The frustration is real, but the problem is almost never the effort. It is the process.
Knowing how to make embroidered patches the right way means understanding each stage from artwork preparation to final backing application. Skip one step, and the whole patch look off.
This guide covers everything, whether you want to try the DIY route at home or understand what the professional method actually involves to designs for custom embroidered patches.
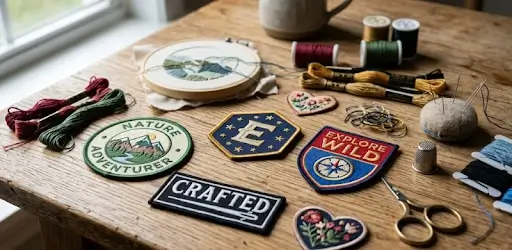
What Are Custom Embroidered Patches?
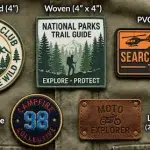
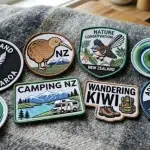
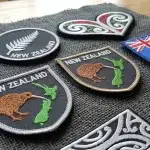
Embroidered patches are fabric-backed pieces decorated with thread stitched into a design. They attach to garments, bags, hats, and gear using sew-on, iron-on, or hook-and-loop backing.
The most common types include embroidered patches. It uses raised thread for a textured and durable finish. They remain the most popular choice because they deliver a classic, premium look that holds up through years of wear. The thread construction gives them a three-dimensional quality that printed or woven alternatives simply cannot match.
How to Make Custom Embroidery Process Explained (Step-by-Step Overview)
The custom embroidery process follows a precise sequence. Each step directly affects the quality of the finished patch, which is why professionals treat none of them as optional.
1. Digitizing the Design
Digitizing converts your artwork into a stitch file that an embroidery machine reads. A skilled digitizer maps out stitch direction, density, and type for every element in the design. Poor digitizing produces loose stitches, gaps, and thread breaks during production.
2. Choose Fabric Base
Most patches use twill fabric as the base because it holds stitching firmly and resists fraying. The fabric weight and weave affect how cleanly the design sits on the surface. Thinner or looser base fabrics cause stitching to sink or distort.
3. Thread Selection
Embroidery thread comes in polyester and rayon varieties. Polyester thread resists fading and washing better, making it the standard choice for patches that need to last. Thread colour selection happens at this stage and directly affects how the finished design reads at a distance.
4. Machine Embroidery
Industrial embroidery machines stitch the design onto the fabric base using the digitized file. Modern machines run multiple needles simultaneously, switching thread colours automatically. Stitch count, machine speed, and tension all affect the final texture and finish.
5. Cutting and Bordering
After stitching, each patch gets cut from the base fabric and finished with a border. The merrow border, a looped overlock stitch around the edge, is the most recognisable finish on embroidered patches. Hot cut edges offer a cleaner look for complex shapes.
6. Backing Application
The final step applies the backing that determines how the patch attaches to fabric. Options include iron-on heat adhesive, sew-on plain backing, and hook-and-loop for removable attachment. The backing gets pressed or bonded to the reverse side before quality inspection and packaging.
How to Make Embroidered Patches (DIY Method)
The DIY approach to how to make embroidered patches works well for one-off personal projects and creative experimentation.
Tools you need:
- Embroidery hoop
- Stabiliser fabric
- Embroidery thread
- Hand or home embroidery machine
- Sharp scissors
- Felt or twill for the base
- Iron-on adhesive sheet
Basic steps:
- Place the stabiliser and base fabric in the embroidery hoop.
- Stitch your design onto the fabric (by hand or machine).
- Cut around the design, leaving a small border.
- Seal the edges with stitching or fabric glue.
- Attach the iron-on adhesive to the back.
- Press with an iron to activate the backing.
How to Make Custom Embroidered Patches (Professional Method)
The professional approach to how to make custom embroidered patches starts where DIY ends. Industrial embroidery machines run at thousands of stitches per minute with computer-controlled precision across dozens of patches simultaneously.
- Create or finalize the patch design digitally.
- Convert the design into a digitized embroidery file.
- Select base fabric and thread colors.
- Load the design into an industrial embroidery machine.
- Run the embroidery process across multiple patches at once.
- Cut patches using laser or die-cut methods.
- Apply borders (merrowed, heat-cut, or stitched).
- Add backing (iron-on, Velcro, or sew-on).
- Inspect quality and finish the final patches.
How to Choose Colours for Custom Embroidered Patches
Colour choice shapes how your patch reads in real life, and embroidery colour behaves differently from print colour. Thread colours appear slightly different from Pantone or CMYK values because thread has texture and sheen that flat ink does not.
| Situation | What Most People Do ❌ | What Actually Works ✅ | Why It Matters |
| Matching brand colours | Expect exact Pantone match | Choose closest thread shade + test sample | Thread reflects light, so exact matches rarely happen |
| Using too many colours | Add 8–10 colours for detail | Limit to 3–5 strong colours | Too many colours look messy and increase cost |
| Low contrast designs | Dark text on dark background | High contrast (light vs dark) | Embroidery loses fine detail without contrast |
| Small text or details | Use thin fonts and tiny elements | Use bold fonts and simplified shapes | Thread thickness makes small details unreadable |
| Gradient designs | Try to replicate print gradients | Use solid colour blocks or shading stitches | Embroidery can’t replicate smooth gradients well |
| Fabric background match | Ignore base fabric colour | Use fabric as part of the design | Saves cost and improves visual balance |
| Outdoor / uniform patches | Choose aesthetic colours only | Choose durable, visible colours | Visibility matters more than style in real use |
| First-time designs | Skip sampling | Always request a sample stitch-out | What you see on screen ≠ final patch |
What Is the Difference Between Embroidered and Printed Patches?
Both serve the same function but deliver a very different result in terms of feel, durability, and visual impact.
| Feature | Embroidered Patches | Printed Patches |
| Texture | Raised, tactile thread surface | Flat, smooth surface |
| Durability | Thread resists fading and wear | Ink fades with UV and washing |
| Detail Level | Limited by stitch size | Reproduces fine lines and gradients |
| Cost | Higher for complex designs | Lower upfront, especially for photo-realistic art |
| Premium Appeal | Strong and classic | Often reads as mass-produced |
| Best For | Logos, lettering, bold graphics | Photographs, gradients, very fine detail |
Key Mistakes to Avoid When Making Custom Embroidery Patches
Even good designs fail when the production decisions behind them go wrong. These are the mistakes that consistently damage the final result.
- Too much detail in the design. Embroidery has a minimum stitch size. Fine lines, tiny text, and intricate gradients disappear or blur in thread form.
- Wrong backing for the fabric. Iron-on backing works well on cotton and denim. It fails on nylon, polyester, and waterproof fabrics.
- Poor colour contrast. Designs that look bold on screen flatten out completely when stitched. Always check contrast by converting your design to greyscale before approving it.
- Ignoring fabric base choice. The base fabric affects how tightly the stitching sits and how cleanly the edges finish. Thin or stretchy bases cause distortion throughout production.
- Skipping the proof stage. Approving a design without reviewing a physical or digital stitch proof locks in every mistake.
FAQs
How long does it take to make embroidered patches?
Professional production typically takes 7 to 14 business days from design approval to dispatch, depending on order size and complexity.
What fabric is best for embroidered patches?
Twill fabric is the industry standard base for embroidered patches. It holds stitching firmly, resists fraying, and provides a clean surface for the thread to sit on without distorting.
Can I make patches at home?
Yes. With an embroidery hoop, stabiliser, thread, and basic embroidery skills you can produce patches at home. The results suit personal projects well but lack the consistency and durability of professionally produced patches.
Are embroidered patches durable?
Professionally made embroidered patches are extremely durable. High-quality polyester thread resists UV fading, washing, and physical wear for years when the patch is correctly applied and cared for.
What backing is best for embroidered patches?
It depends on the fabric. Iron-on backing works well on cotton and denim. Sew-on backing suits any fabric and provides the strongest long-term hold.
Conclusion
The gap between a patch that looks amateur and one that looks professional comes down entirely to process. DIY methods give you creative control and hands-on experience, but they cannot replicate the stitch precision, colour consistency, and durability that professional production delivers at scale.
Whether you start at home to understand the craft or come straight to a professional for a finished result you can wear with confidence, the knowledge in this guide puts you ahead of most people who approach patching without it.
At Embroidery Patch NZ, we bring together expert digitizing, commercial-grade equipment, and real customer support to produce custom embroidered patches that hold their quality through years of real-world use. From single custom pieces to large wholesale runs, we handle every order with the same attention to detail from the very first stitch to the final backing.