Garment modification changes simple clothes into special creations that help you show yourself off. There is no need to throw away old denim jackets and jeans. They may be used creatively, unlike fast fashion that lacks uniqueness.
This allows you to get an unusual look. Still, many problems come up while doing it, most frequently connected with your uncertainty about how to iron on a patch without ruining it.
Indeed, mistakes may ruin your favourite clothes. Nevertheless, with enough effort and knowledge, there is nothing to worry about. Enjoy showing your style to others!
Why Understanding Your Fabric Type Matters Most
Reading your clothes’ tags before ironing them would always be best. Knowledge about how heat interacts with different fabrics is important in doing this task.
The selection of the material of fabric depends on how durable that particular material is to repeated exposure to heat, such as during laundry. Hence, the reason why it is advisable to choose thick materials for customisation, such as cotton and denim.
Polyester is made from plastic, and therefore, more attention should be paid to it when applying heat on it because you may damage it completely. Heat application to polyester requires one to wear some sort of protective cloth so as to avoid melting it.
On the other hand, very delicate fabrics such as silk, rayon, nylon, and lace do not perform well under heat, while nylon has the least melting point compared to others and can therefore burn easily.
Gathering the Right Equipment Without Overcomplicating Things
In order to attain a perfect result at home, all that is required is a regular iron with temperature control that is available in every household. It must be ensured that there is no water left in the iron, as water will react with the heat-sensitive glue that will start the process. One needs to place a metal plate or put a thick folded cloth on an ironing board.
One cannot stress enough about the importance of a pressing cloth here. A thin cloth like a tea towel made of cotton or a cotton pillow case will do just fine. A pressing cloth ensures proper heat distribution across your material and saves it from burning or giving a shiny effect.
Following the Correct Procedure
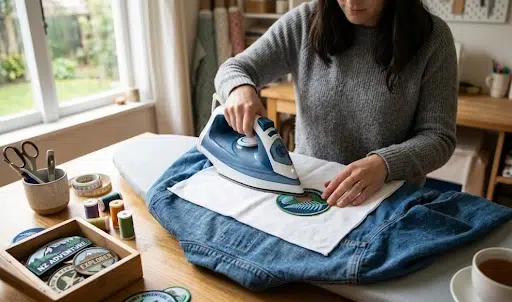
How to iron on a patch safely? First start by finding a good ironing board and then folding your clothing so that all of the visible wrinkles have been removed from your clothing by using your hand. This will help create no creases once the iron is cooled down.
When you are finished folding the jeans, remove the iron from its stand and turn on the iron. If the clothing you are using is denim or cotton material, you can use the highest setting on the iron. Look at the clothing label before using this method.
You then want to take your patch and place it in the appropriate location and align the patch correctly. You would then take a cotton towel and put the towel over the patch before you use the iron on it. Take the iron and put pressure down and hold for about 30 to 45 seconds.
Do not go back and forth with the iron because you will move the patch you are using and smear the glue. When the time is up, lift the iron off of the patch and wipe away the cotton towel once the clothing/patch is cold to the touch.
Revitalising Your Wardrobe
In looking at how to iron on a patch to a shirt, the material used can be either lightweight or stretchable. It has been found out that most t-shirts are made up of lightweight material, which is generally cotton fabric or cotton-polyester material. This is due to the fact that heat transference occurs quickly.
A good position is very important when applying the patch. It is usually applied to the left chest of the t-shirt just like a pocket logo. However, one needs to be careful about how it dangles from the t-shirt. It would not look nice having a large, stiff design hanging from a thin, comfortable shirt.
One should use a tea towel as a shield from direct heating, as thin cotton tends to yellow when subjected to too much heat. After ironing the front side of the shirt, it is turned upside down and pressed again for fifteen seconds from the back side.
Upgrading Your Gear
Customisation will add uniqueness to your bag. However, figuring out how to put a patch on a backpack with an iron can be challenging because of the nature of such bags.
Instead of ironing through a flat part of the bag, form a flat part within the bag using rolled bath towels. The bath towels should be packed tightly enough to make the area bulge out. Place the bag flatly with the area intended for patch application on top.
The iron should not be too hot because this may damage the synthetic bag fabric. Protect your bag from the iron heat by placing a cotton cloth before ironing. Ensure that the iron stays long enough to melt the glue.
Tackling Heavy-Duty Canvas
The steps involved in how to iron on a patch on a backpack constructed from materials like canvas or Cordura include dealing with issues related to the penetration of heat. The material acts as an insulator to prevent the heat from reaching the glue.
The patch can be effectively attached by setting the iron to its maximum temperature level when using settings appropriate for cotton and linen and applying substantial pressure.
You will need to press down the outer surface using your body weight for about forty-five seconds. Next, you should open the bag and place the iron on the inner surface for another thirty seconds.
Customising Your Headwear
The process of how to put an iron on patch on a hat can be difficult since a hat has a round shape. The person will have to be creative enough to do so. Firstly, make use of any object that will act as your head to support the construction of your hat.
It can be a twisted hand towel, and you lay the hat on top of it. Use one hand to hold the hat’s brim down and press it onto the towel while making sure it is pressed against the front panel of the hat.
In order to put the iron-on patch on the hat, first place it on it and then place a piece of fabric above it before putting on heat using the iron’s tip. Ensure the iron has the right temperature before heating the patch on the hat.
The Quality Difference with Premium Iron-On Patches
Your success with the customisation project will depend on the material used rather than only the ironing process. Low quality, mass-produced patches have a layer of poor quality glue that can easily peel off after a couple of washes. High-quality iron on patches from companies such as Embroidery Patch NZ make use of the best type of industrial adhesive.
This type of adhesive is engineered to soften at high temperatures and form a bond with the fibres in the fabric of the garment, creating a permanent bond. One sign that you have a good patch is the presence of a shiny layer of adhesive around its edges.
Selecting the Perfect Iron-On Patch for Your Style
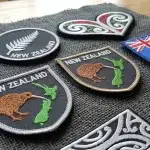
Once you start looking around at options to design your iron-on patch, the fun really begins. Choosing an iron on patch involves more than selecting something cool. It involves choosing based on size, colour, and contrast.
With a jacket that is dark blue or black in colour, you will definitely need an accessory that can stand out from it. Some of the accessories you may want to choose include those that feature bright or bold colours, such as neon colours or even white accessories.
On the other hand, when dealing with a bright white canvas tote bag, then anything dark that has saturation will make the design stand out even more. In addition to that, don’t forget about how big your space is.
Why People Prefer Iron-On Patches Over Sewing
Even though the old way of sewing things using needles and threads is both beautiful and necessary, it cannot be done by everyone. We are always running around in life, and spending hours sitting still to sew through many layers of tough fabrics like denim is too difficult and painful.
It is this exact reason why iron patches have been loved universally by both craft lovers and parents alike. Not only is ironing much easier than sewing, but you do not even have to have a sewing machine in order to attach great-looking pieces. With the exception of patches that are usually better off with sewing like leather patches.
All you need is a regular iron from home and some extra minutes, which is much better than spending hours sewing through layers of fabric. Especially when you have a stack of clothes belonging to your kids that have to be patched and decorated before the next school year begins.
The Tradition of Collecting Iron-On Badges
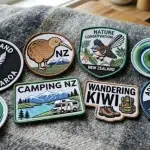
There is an incredible amount of nostalgia involved in these tiny works of embroidered patch art. For generations now, it has been a popular hobby to collect iron on badges throughout New Zealand and around the globe. Imagine going back to the times when scout troops used to go camping and earn little emblems to pin on their uniforms as they acquired new skills.
They are also used to express brotherhood among motorcycle enthusiasts, as well as by travellers to document the places they have visited as they add more iron-on patches to their backpacks. This practice has become even more common in the world of fashion, as people collect pins that reflect their taste in music or politics or simply show off some humour.
Caring for Your Newly Customised Garments
To ensure that your project looks beautiful even when completed, you will need to take good care of it. Always remember to turn the clothing inside out when doing laundry. The direct washing process will damage the thread used for embroidering your project.
Avoid using the tumble dryer, as the heat may affect the glued parts. Rather, hang the clothing straight in an airy room where it can air dry with the breezy weather of New Zealand.
Troubleshooting Common Application Mistakes
However, sometimes even with the best intentions, the design might start to peel off from its place. This generally occurs due to a lack of ironing duration or pressure on the thick embroidered borders. To solve this problem, first lay the dress flat and cover the peeling border with a tea towel.
Then apply the hot iron to the border for 20-30 seconds with firm pressure. In case the fabric is not glue-friendly, for example, the waterproof raincoat, then use an industrial fabric glue under the border.
Removing iron-on patches can be done by simply using a hot iron again and using tweezers to pull out. Left over glue marks can be cleaned with liquid cleaners and removers.
Frequently Asked Questions
Which is the easiest method to attach a patch?
Iron on your patches for an easy and quick attachment.
How to iron-on patches to polyester fabric?
Heat from an iron can burn your polyester fabric surface and harm your custom patch. Always keep a cloth between the iron and the surface to avoid direct heat contact or use a hairdryer for a moderate heat emission. Else, you can sew on your patches.
Which is better: iron on or sew on?
For convenience, iron on your patches, and for most durability, go for sewing. One can do both for a hybrid approach.
Are iron-on patches cheaper?
Iron-on patches tend to be cheaper than other backings like Velcro. Plus, you can attach them at home yourself with an iron, minimising application costs.
All Set to Transform Your Wardrobe?
With your arsenal of expert information after reading this blog on how to iron on a patch safely, start designing using your new skills without burning or damaging any of your favourite shirts or gear. The best part about customising your clothes is that it is not only super fun but also gives you a chance to express yourself like never before.
It is a simple project for the weekend that will provide instant satisfaction. It does not matter whether you want to repair holes in your rugged hiking pants, jazz up a plain tote bag, or design a masterpiece of a vintage denim jacket. We have got all the materials you will ever need for that.
Visit our catalogue right now and pick some of the awesome designs that we offer at Embroidery Patch NZ. Grab your ironing tools, prepare your board, and start customising your clothes. Enquire now for free!